back Manage Labels
Learn how to create, modify or delete labels of a label tree.
Each label consists of a name and a color. The label colors help you to identify the labels both in the label tree(s) and in the annotation tool, as annotations are colored according to the labels that are attached to them. In addition to that, a label can have a parent label, too. This allows you to arrange labels in a tree-like structure, the label tree.
The labels of a label tree can only be modified by label tree members. To create labels, click on the button of the labels panel. This will show you two tabs which are the two ways to create new labels: manually and by WoRMS import.
Create labels manually
The "Manual" tab shows three controls: the color chooser, the label parent chooser and the field to enter the new label name. To create your first label, choose a color with the color picker (click on the colored rectangle) or get a random color with a click on the button. Next, enter the new label name and hit enter.
Once there is a label in the tree, you can (but don't have to) create child labels for it. To do this, select the label in the tree. Its name will appear in the label parent chooser. Alternatively you can enter the name of the parent label in the parent label chooser, too. This is particularly useful for large label trees. When you select a parent label, the selected color will automatically change to the one of the selected label. You can either re-use the same color for child labels or select a new color at this point. Finally, enter the name of the child label and hit enter.
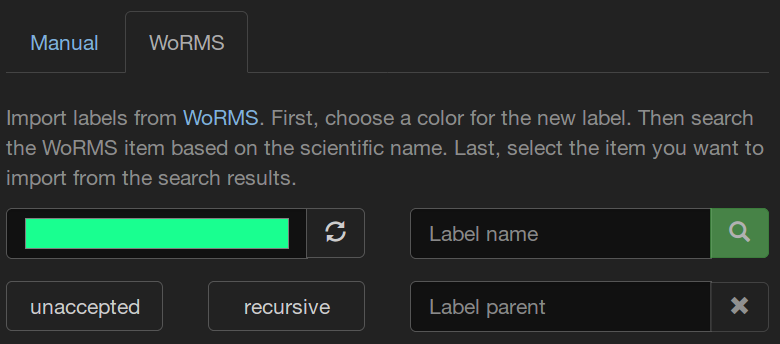
Import labels from WoRMS
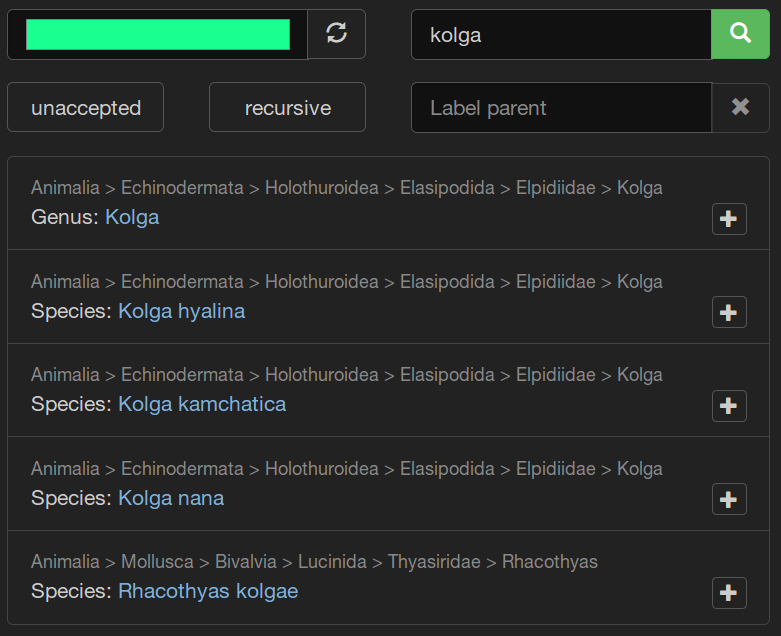
As an alternative to create labels manually, you can import them from the World Register of Marine Species. To search for a species, enter (part of) the label name and hit enter. The list of search results will be shown below. Items that already have been imported will be highlighted in green.
By default, only accepted items from WoRMS will be included in the search results. If you also want to include unaccepted results (e.g. synonyms), activate the button before you search.
Now you have three options to import the found species as new labels. The simplest is to click on the button of the species you want to import. This will add the species as a new root label to the label tree.
The next option is to add a found species as a child label. Similar to creating labels manually, you first select an existing label from the label tree as parent and then click the button of the species you want to import.
The last and most powerful option is the recursive import. This will import the found species and the whole hierarchy of parent labels from WoRMS. If you take the genus "Kolga" from the image above, for example, this would include the labels Biota, Animalia, Echinodermata, Holothuroidea, Elasipodida, Elpidiidae and Kolga! To perform a recursive import, click the button first and then the button of the species you want to import.
The recursive import respects previously imported labels, too. Just keep the button activated, import labels and they will be placed at their appropriate position in the tree.
Modify labels
To modify an existing label, first click on the button of the labels panel. This will make a symbol appear on the right of each label in the tree. Click this symbol to switch a label into edit mode.
In edit mode, the color and name of the label are editable. Choose a new color or name and click the symbol to save the changes. To revert unsaved changes and exit edit mode, click . To delete a label from the label tree, click the symbol. Only labels that have no child labels and that are not attached to an image or an annotation can be deleted.
The parent of existing labels cannot be modified in the user interface at this time. However, you can use the endpoint of the REST API.
Continue to learn more about versioned label trees in the next section.


